
Punch Needle Mug Rugs: A Cozy Weekend Project
If you have ever wanted the look of a tiny rug but did not want to commit to a full-size project, punch needle mug rugs are the answer. They work up in an afternoon, use small amounts of yarn, and give you that satisfying looped texture without any complicated finishing. I made my first one on a rainy Saturday and had a finished coaster by dinner.
The supplies are simple: a punch needle tool (adjustable or fixed), monk's cloth or weaver's cloth, worsted or bulky yarn, an embroidery hoop, a marker, and sharp scissors. Monk's cloth has a visible grid that makes counting easy, which helps beginners keep rows straight. A six-inch hoop is plenty for a mug rug.
Transferring Your Design and Setting Up
Start with a simple shape. Circles, hearts, stars, and chunky letters all work well. Draw your design directly on the monk's cloth with a washable marker, keeping it at least an inch from the hoop edge. Remember that punch needle is worked from the back, so your design will appear mirrored on the front. If you are doing letters, draw them backwards.
Stretch the cloth in your hoop until it is drum-tight. Loose fabric causes skipped stitches and uneven loops. Thread your punch needle according to its instructions, usually by feeding yarn through the hollow handle and out the tip. Leave a six-inch tail hanging out the back.
Set your loop height. Most adjustable tools have a slider that controls how tall the loops sit. For a mug rug, a medium setting around a quarter inch works well. Test on a scrap of cloth first to check the height.
Punching Your Way to a Finished Rug
Punch the needle through the fabric from the back until the handle rests against the cloth, then lift straight up without twisting. Move along your outline, leaving small gaps between punches so the loops have room. Fill in the shape by working in rows or spirals, always keeping your punches close but not crowded.
When you finish an area, clip the yarn leaving a tail on the back side. Do not trim the loops on the front unless you want a cut-pile look. Looped pile is more durable for something that will sit under a hot mug.
Once the design is filled, remove the fabric from the hoop. Trim the excess monk's cloth, leaving about an inch of border. Fold the border to the back and glue or stitch it down. For a non-slip finish, cut a piece of felt slightly smaller than the rug and stitch it to the back, hiding all the yarn tails underneath.
These little rugs are addictive. I now have a stack in different colors for every season, and they make great housewarming gifts paired with a bag of good coffee. Try one this weekend and see how quickly the looped texture hooks you.


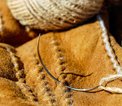

Punch needle is faster than embroidery and more forgiving than rug hooking, making it perfect for small, satisfying projects like mug rugs.
Give a cracked pot a second life as a whimsical miniature garden complete with tiny paths, plants, and a fairy door.
Learn to carve simple rubber stamps and print them onto tea towels, tote bags, and napkins for custom handmade textiles.
Make reusable beeswax wraps from cotton fabric, beeswax, and a little jojoba oil to replace plastic wrap in your kitchen.
Give worn-out jeans a second life as sturdy, stylish plant hangers that bring texture and character to any room.